
Piercing Guide
Knowing the names of each piercing and exactly where it is located can be confusing! Use our guide to help you select your next piercing.
The downsizing and healing times are averages and everyone is different with their healing experiences. Some piercings are not suitable for everyone’s anatomy and we may suggest an alternative.
We may offer more piercings than the ones listed here and if we don’t, we will always refer you to a reputable piercer who does!
We are always happy to answer any questions you may have about the piercings we provide by booking a quick consultation or messaging us.
Lowest part of the ear. Soft tissue with no cartilage
Initial jewellery: Labret bar
Downsize: 6-8 weeks
Healing: 3-6 months

Lobes
Outer ridge of the top section of the ear
Initial jewellery: Labret bar
Downsize: 2-3 months
Healing: 6-12 months

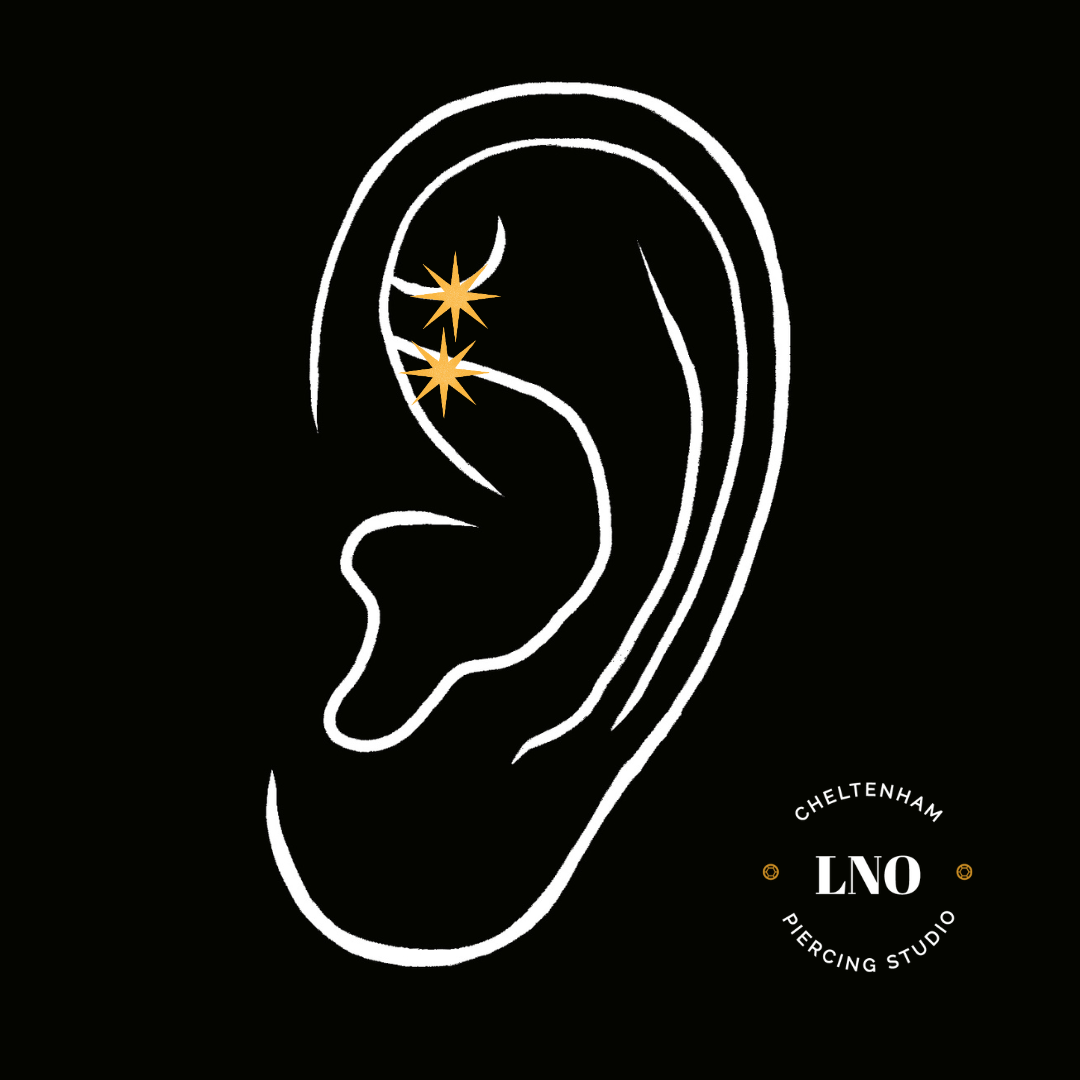
Helix
Small amount cartilage in front of the ear canal
Initial jewellery: Labret bar
Downsize: 2-4 months
Healing: 6-12 months

Tragus
Inner part of the ear
Initial jewellery: Labret bar
Downsize: 2-3 months
Healing: 6-12 months
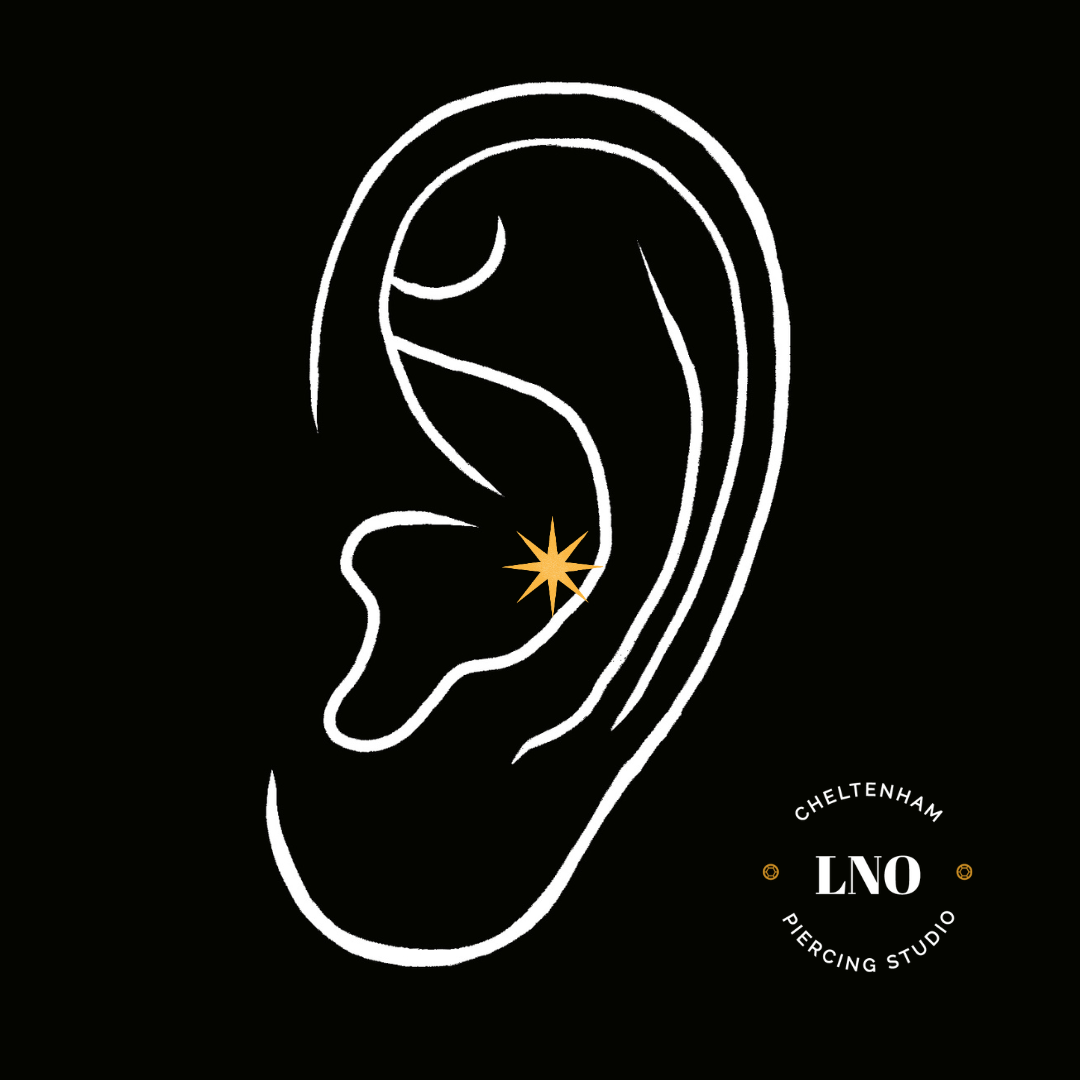
Conch
Top part of the ear cartilage
Initial jewellery: Labret bar
Downsize: 2-3 months
Healing: 6-12 months

Flat
Inner ridge above the ear canal
Initial jewellery: Ring
Downsize: End of healing
Healing: 12-18 months

Daith
Inner ridge in the top part of the ear
Initial jewellery: Curved barbell
Downsize: End of healing
Healing: 12-18 months
Rook
Alternative to a rook, above the inner ridge on the top of the ear
Initial jewellery: Labret bar
Downsize: 2-3 months
Healing: 6-12 months

Faux Rook
Outer ridge closer to the head
Initial jewellery: Labret bar
Downsize: 2-3 months
Healing: 6-12 months

Forward Helix
The outer ridge of the top section of the ear
Initial jewellery: Straight barbell
Downsize: 2-4 months
Healing: 12-18 months

Scaffold/Industrial
Side of the nostril
Initial jewellery: Labret bar
Downsize: 2-3 months
Healing: 6-9 months

Nose
Tissue in between 2 sections on cartilage inside the nose
Initial jewellery: Circular barbell or ring
Downsize: 2-4 weeks
Healing: 1-3 months

Septum
Any of the lower lip
Initial jewellery: Labret bar
Downsize: 2-4 weeks
Healing: 1-2 months

Labret
From the bottom to the top of the lower lip.
Initial jewellery: Curved barbell
Downsize: 2-4 weeks
Healing: 1-2 months

Vertical Labret
Centre of the top lip
Initial jewellery: Labret bar
Downsize: 2-4 weeks
Healing: 1-2 months

Medusa
Paired lower lip piercings
Initial jewellery: Labret bar
Downsize: 2-4 weeks
Healing: 1-2 months

Snakebites
Top fold of tissue of the belly button
Initial jewellery: Curved barbell
Downsize: 2-4 months
Healing: 4-12 months

Navel
Top fold of tissue of the belly button
Initial jewellery: Curved barbell with flat disk on the bottom
Downsize: 2-4 months
Healing: 4-12 months

Floating Navel
Areola of the breast or pectoral
Initial jewellery: Straight barbell
Downsize: 2-4 weeks
Healing: 1-3 months
